22

I wanted to prepare a distro for some friends.
As I didn't have anything else lying around, I used a 16Gb SD card.

I started with the default Debian Weezy 2Gb image and did not do any resizing.
Now, as I am done, I wanted to create an image of what I did, but I get a 16Gb file, containing 14Gb of unpartitioned (not partitioned and free) space at the end.

[I used Windows // Win32DiskImager as I have nothing free to stick into the rPI right now]

Can I just truncate the image file right behind the partitioned space and transfer the leading part onto a smaller card, then?

Nippey
  • 671
  • 1
  • 7
  • 12

5 Answers5

35

I finally found a resource that is explaining my question.

http://softwarebakery.com/shrinking-images-on-linux

Short:

Yes, truncating is possible!

Summary of the process:

Extracting the partition information from the image using fdisk:

$ fdisk -lu image.img
Disk image.img: 4096 MB, 4096000000 bytes, 8000000 sectors
Units = sectors of 1 * 512 = 512 bytes
Sector size (logical/physical): 512 bytes / 512 bytes
I/O size (minimum/optimal): 512 bytes / 512 bytes
Disk identifier: 0x000a1bc7

      Device Boot      Start         End      Blocks   Id  System
image.img1              2048     5872026     5869978    b  W95 FAT32

We see, that the partition has a size of about 2,8Gb (5872026 * 512), the rest is unpartitioned.

So, everything after the end of the partition can be removed.
This will be done with the tool truncate. Don't forget to add 1 to the number of sectors, as block-numbers start at 0.

$ truncate --size=$[(5872026+1)*512] image.img


Edit:

For those being too lazy to switch to Linux:
Also works on Windows with Cygwin's fdisk.exe and truncate.exe!

What is Cygwin?

I may cite: "Cygwin: Get that Linux feeling - on Windows" (https://www.cygwin.com/).
It is a set of executeables that can run under Windows, but provide all the command line programs you usually know from Linux. Cygwin can take very long to install if you select every package during install, but to follow this example, simply make sure, that besides the default configuration, also the packages util-linux (fdisk) and coreutils (truncate) are selected.
Depending on your environment, you man need to add /usr/bin and /usr/sbin to your $PATH.

Nippey
  • 671
  • 1
  • 7
  • 12
5

I know this is an old question, but I would like to show how to do this process on Mac, because it is not as easy: fdisk doesn't have the -l option, and truncate is not installed by default:

1. Step 1: Install truncate on Mac OS X:

You need MacPorts or Homebrew for this. I use MacPorts. If you don't have one of these, go ahead and install them first. Link to MacPorts

Now, we can install truncate. Open up your Terminal and type:

sudo port install truncate

For Brew installation:

brew install truncate

This should do it.

2. Use Disk Utilities to mount our IMG so that it is visible to the diskutil terminal command.

You will see in a moment why we need this step. Open the Disk Utility app. Click on File (on the top bar) -> Open Disk Image and select your IMG file.

3. Check the partition size of the IMG and where it is mounted.

On a Terminal, type:

diskutil list

And it should show something like this, somewhere in the end:

/dev/disk3 (disk image):
   #:                       TYPE NAME                    SIZE       IDENTIFIER
   0:     FDisk_partition_scheme                        +16.0 GB    disk3
   1:             Windows_FAT_32 boot                    62.9 MB    disk3s1
   2:                      Linux                         3.9 GB     disk3s2

So, we see that about 12GB are unpartitioned. We need to truncate those.

The reason we need this command is to check out where the disk image is mounted. In my case, it is under: /dev/disk3

4. Find out the actual partition size.

3.9 GB and 62.9 MB are values that won't work with truncate. We need to find the partition sizes in bytes.

5. Run fdisk.

In your Terminal, run this command:

   fdisk /dev/diskX

Where X is the number that you found out in the previous step. This should result in something like this:

         Starting       Ending
 #: id  cyl  hd sec -  cyl  hd sec [     start -       size]
------------------------------------------------------------------------
 1: 0C    0 130   3 -    8  40  32 [      8192 -     122880] Win95 FAT32L
 2: 83    8  40  33 -  478  79  49 [    131072 -    7553024] Linux files*
 3: 00    0   0   0 -    0   0   0 [         0 -          0] unused      
 4: 00    0   0   0 -    0   0   0 [         0 -          0] unused      

6. Time to truncate!

On your terminal, cd to the directory that your image is. Then, write:

truncate FILE SIZE

FILE is your file of course.

SIZE is the size in bytes. What I did, is to add to the size column of the fdisk command, the start column and multiply by 512. So, in my case SIZE will be: 512 * (7553024 + 131072) = 3934257152, which is approximately 3.9 GB.

You will need the start and size of the last partition that is shown by fdisk. (Not necessarily the biggest, but the one in the end of the IMG file)

I experimented a bit, and whenever I entered 7553024 * 512 or (7553024 + 1) * 512 bytes, the IMG file was corrupt. So, just to be sure, do it as I indicate above. It might add more than actually needed, but it is a safe option.

7. (Optional) Easily test if the IMG is not corrupt.

Go once more in the Disk Utility, and try to open the new IMG file as before. If it mounts, you can also see the new (smaller) size. If it doesn't mount, something went wrong. (Maybe try to increase the size in the truncate command)

This is not the best test, but it is a sure way to check if the new IMG is corrupt or not. So, don't really count on it, but it is worth the try...

I hope someone finds this helpful!
Can Celik
  • 103
  • 4
ant0nisk
  • 183
  • 1
  • 5
1

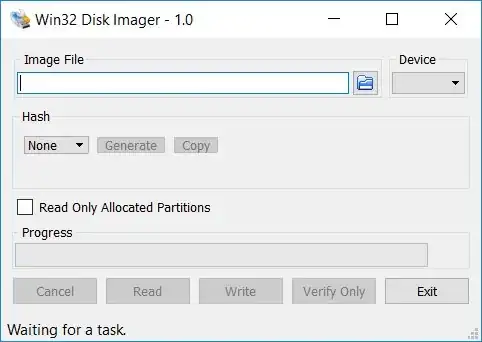
Recent Win32DiskImager actually has an option to only include allocated partitions in the disk image. This will do the trimming in one click.

enter image description here

Dmitry Grigoryev
  • 28,277
  • 6
  • 54
  • 147
1

Just something I have recently noticed as I do a lot of this Win32diskimg operations for backing up my RPI images for deployment. I recently starting testing SD "trimming" fstrim to clean parts of the SD card not in use for theoretical wear leveling. Not sure about the effect it will have but one side effect was when I imaged the 16GB SD partition and then used 7zip to compress it. I went from the usual 16GB to 9.5GB to now a 2.5GB file. I am testing now to make sure nothing is wrong but it appears that using TRIM to mark the unused space as 0's makes the image compression far more efficient (which does make sense). Just wanted to report at this was super easy to accomplish and no multiple steps.

jctghost
  • 11
  • 1
0

Truncate 2 partitions image

sudo losetup --partscan /dev/loop13 disk_image.img
sudo e2fsck -f /dev/loop13p1
sudo e2fsck -f /dev/loop13p2
'
sudo resize2fs /dev/loop13p1 -M
sudo resize2fs /dev/loop13p2 -M
'
### RUN THE "DISC" software and resize partition using the gui
fdisk -l disk_image.img
sudo losetup --detach /dev/loop13
truncate -s $(INSERT THE (END*BLOCKSIZE) OF PARTITION2 HERE) disk_image.img
sudo losetup --partscan /dev/loop13 disk_image.img
mkdir /tmp/disk_image
sudo mount /dev/loop13p1 /tmp/disk_image
sudo fstrim -v /tmp/disk_image
sudo umount /tmp/disk_image
sudo losetup --detach /dev/loop13
hotnikq
  • 1
  • 1