4

I have an Arduino Pro Micro clone that seems to be in some sort of reset loop. The RX LED is flickering very fast and very dim. The power LED also seems to flicker at the same frequency but has normal brightness.

The Arduino is not recognized by the PC at all anymore. It was working fine before. It doesn't matter if I try to go into the bootloader, by pressing reset twice, or not. Nothing happens. It feels like it is constantly resetting. The flickering stops if the reset pin stays connected to GND.

Another clone from the same shipment is still working fine. Both running the blink sketch. Just this one started to malfunction all of the sudden - after probing the pin I set in the blink sketch with my multimeter to see if the flashing was a success.

timonsku
  • 141
  • 1
  • 1
  • 4

7 Answers7

4

If your pro micro does not have a reset button, wire one between reset and ground.

Press reset twice, quickly, and immediately hit upload on the IDE.

Secondly, make sure you've downloaded and installed the Sparkfun board files for the pro micro.

JW2
  • 206
  • 1
  • 9
1

I bricked my Pro-Micro within ten minutes of ripping it out the packet. I didn't realise that (a) it's not so brilliant on USB 3.0 - or in my case, unuseable, and (b) it's not actually an Arduino board - the Pro-Micro is a SparkFun product, and any clones thereof are from SparkFun's schematics.

The latter was only a problem to begin with, while I was scrabbling around on the Arduino website in vain trying to find answers. Once I realised to visit SF's website everything calmed down. Read this section on bricked/unrecognised pro-micros, and then have a look at the rest of the page as further reading.

CharlieHanson
  • 1,430
  • 1
  • 11
  • 25
1

Try this: unplug the Arduino, hold down the reset button, and then plug it in to power. Hold down the reset button a few seconds after you power it on. If this works, you should get the "blink" sketch, and be able to reprogram it.

Alternatively, if you have an ICSP programmer (I use the FreeTronics USBASP), plug this in (you will need to wire up the appropriate 6 pins), and then use the Arduino IDE to burn the bootloader - select the board, serial port, and programmer,then select "burn bootloader" - all from the "Tools" pull-down menu.

AMADANON Inc.
  • 2,383
  • 10
  • 9
1

Try this:

  1. Connect a push button switch to ground and reset (RST) pin;

  2. Click upload then push the button twice (fast) = it doesn't matter if your computer does not recognize the pro micro;

  3. Repeat this if it failed (repeat until you are successful).

After this the Pro Micro port will comeback to life.

I tested it. The reason I think that you bricked it, is because you uploaded using the wrong board setting - commonly the 3.3 V and 5 V (or vice versa)

Greenonline
  • 3,152
  • 7
  • 36
  • 48
Asenkhan
  • 11
  • 1
1

This is a very common problem. See my answer to Arduino Micro just blinks, won't connect to PC.

As Asenkhan says in his answer, it is often caused by attempting to upload to a Pro Micro using the wrong board setting 3.3 V en lieu of 5V, or vice versa.


I have written two lengthy blogs about the whole experience:

Greenonline
  • 3,152
  • 7
  • 36
  • 48
0

You can make it work but only if you use a ISP programmer and burn the bootloader. The internal serial programmer would not work still some HID functions are retained. To me everything works fine except the Mouse functionality.

This a pain in the acc* but it will work for other options. The other thing I have not tried is setting an old arduino ide and use the old addon for pro micro board to see if there a was a change in those files that caused it to fail.

So my next step would be as follow:

  1. Setup the old arduino environment, download the old addon files and burn the bootloader.

Edit: While writting my findings I came with the solution. Just as I thought! You need to use the old files to make this work completely.

Steps:

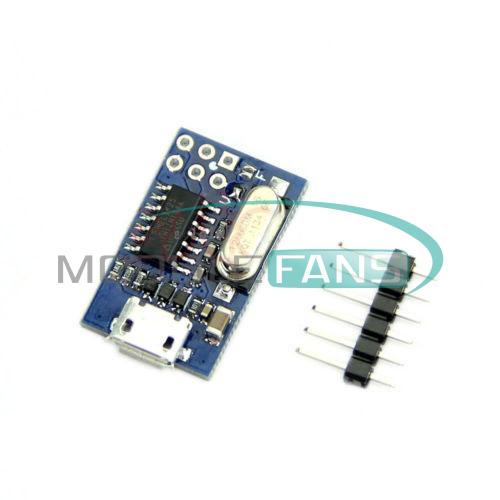
You'll need to buy an ISP Programmer for burning the bootloader or use another arduino board as an ISP Programmer

I used the USBtinyISP Programmer. In specific:

USBtinyISP

Download the old sparkfun files (zip) version

Sparkfun Old Addon Files

Download the old Arduino IDE - I used the 1.0.6 portable (zip) version

[Old Release Files] (https://www.arduino.cc/en/Main/OldSoftwareReleases#previous)

Extract the Arduino IDE to Desktop. After doing so open the Sparkfun addon zip file and extract it to the Desktop. Then rename the extracted folder from:

SF32u4_boards-pre-1.6

To

sparkfun

Alright copy that folder and if you do as I mentioned above now you'll head for the Arduino IDE we just downloaded. When you see the arduino files move into the hardware folder and paste the sparkfun folder inside of it (don't navigate any further than this).

Then connect the ISP following this diagram: Always double check the connections!

Sparkfun Pro Micro Pinout

Now the next steps would be:

  1. Open the Arduino IDE v1.0.6
  2. Select your programmer under Tools (mine was USBtinyISP)
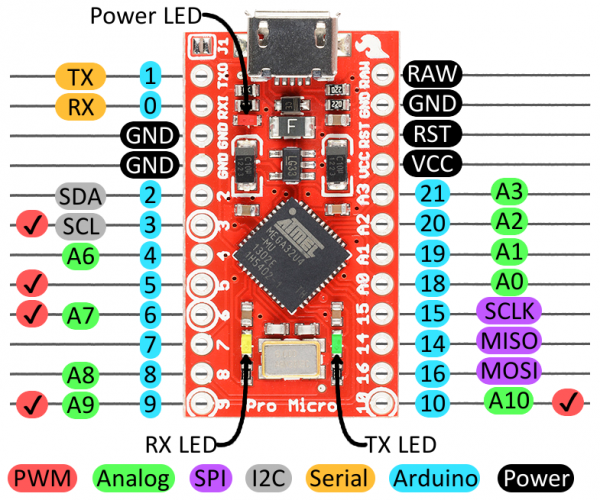
  3. Select your Sparkfun Pro Micro board either the 3.3v or 5v version
  4. Now under Tools select Burn Bootloader

If you do this right after a couple of seconds or minutes you will see a message that the process of burning the bootloader was completed. Depending on your hardware speed, if you store things in a flash drive or system is running on a linux live session you will need to wait a bit so just relax.

If things go according to plan then you can disconnect the ISP programmer and upload a simple sketch to corroborate the board is now working.

int ledPin=10; // let to pin 10

void setup() {
   pinMode(ledPin, OUTPUT);
}

void loop() {
   digitalWrite(ledPin, HIGH);
   delay(1000/2); // 1/2 a second 
   digitalWrite(ledPin, LOW);
}

Upload as you normally would! Double check the board version!!

Perfecto! If the steps were followed in order you'll now have a working device

DarkXDroid
  • 239
  • 1
  • 3
  • 18
-1

It can be problem with bootloader. You can try to burn bootloader again.

See for example:

http://angryelectron.com/how-to-update-the-bootloader-on-arduino-pro-mini-328/

Or use google

Damian G.
  • 57
  • 4