0

I need your help on the headless Raspberry Pi installation.**

I have an Raspberry Pi 3B and I need to do headless Raspberry Pi OS installation and I don't know where I am really getting it wrong, have watched some Youtube videos and articles, asked chatgpt but no luck in getting it to work.

So here of what I have done and it didn't work: I downloaded Raspberry Pi OS (https://downloads.raspberrypi.com/raspios_full_armhf/images/raspios_full_armhf-2024-11-19/2024-11-19-raspios-bookworm-armhf-full.img.xz) and the Raspberry Pi imager and opened the Pi imager, selected Raspberry Pi 3, selected the OS I downloaded in my Downloads, then selected my SD card (I have 16GB SD card), then I hit "Next", then it asked me to Edit the settings and configuration, and I said yes from the tutorial I watched earlier, then from that page, I enabled SSH, and set my user and password, I also set my LAN by putting my Wifi SSID and Password (I had mobile data on my Cellphone so I connected my PC to the hotspot and wanted my Pi to connect to the same Hotspot), then I booted then OS from my SD card. After booting I installed my SD card on my Pi then connected it to power using a USB cable, then it just lights a red LED, no blinking or what. So from the tutorial I expected to see my Pi automatically connected to my hotspot but it didn't, I checked on my mobile hotspot to see the devices connected but i see nothing like raspberrypi or any other connection? I thought maybe I put the wrong password on my WiFi when I configured the Pi but it didn't work too. I thought maybe it needs time to connect, so I gave it about 2hrs to connect but to no avail.

I also then tried to use an Ethernet cable but it didn't even blink those Ethernet lights from both the PC and the Pi, both arp -a and ipconfig didn't show anything?

So what could be the problem or where do I get this wrong? like why cant the Pi connect to my Mobile Hotspot when I power it on?

I am pretty sure the Pi and the SD card is working because my sister has used it using the Pi monitor without any problems but now I don“t have access that monitor.

What I just need is the Pi IP address so that I can access it using RealVNC.
Seamus
  • 23,558
  • 5
  • 42
  • 83

1 Answers1

1

This is a reasonably straightforward process. I can't follow your question as it's confusing to me. However, it seems to me that you took a wrong turn when you wrote this:

... then I booted then OS from my SD card. After booting I installed my SD card on my Pi...

This is unclear to me! So I cannot explain exactly where you went wrong, but I'll try to answer by explaining how to use the Raspberry Pi Imager (RPImgr).

  1. Download the RPImgr to your Mac, Windows or Linux computer.
  2. Connect the SD card you intend to use on that same computer.
  3. Start RPImgr on the same (Mac, Windows or Linux) computer.
  4. Click the CHOOSE DEVICE button, and select the "Raspberry Pi 3" (or whatever RPi you have)
  5. Click the CHOOSE OS button, and then select the Raspberry Pi OS (other)
  6. Then, select the option titled "Raspberry Pi OS Lite (64 bit)" NOTE: "Lite" = "Headless"
  7. Click the CHOOSE STORAGE button
  8. Review the option(s) listed for storage media, and select the one that represents the SD card you inserted in Step 2 above.
  9. A new button (called NEXT) will present itself after you've selected the STORAGE device; click the NEXT button.
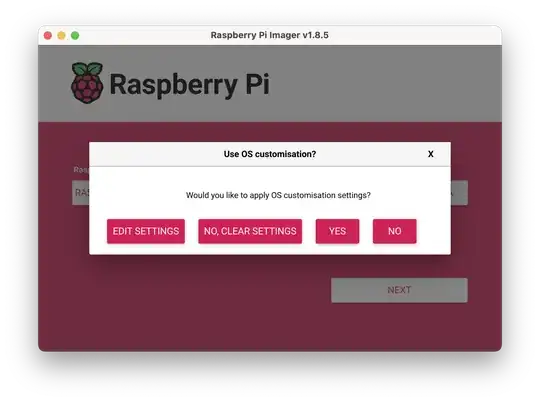
  10. A "pop-up" window will appear asking, Would you like to apply OS customisation settings?
  11. Click the EDIT SETTINGS button
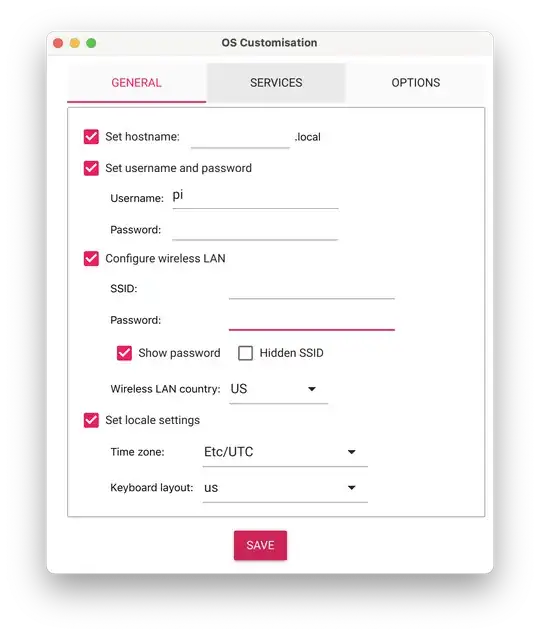
  12. Another "pop-up" will appear; this "pop-up" has 3 tabs at the top of the window: GENERAL, SERVICES and OPTIONS:
  13. GENERAL
  • Fill in the blank for hostname; e.g. pi3_TWS
  • use pi as the username & enter (and remember) a password
  • if you're using wifi, enter the wifi SSID, the wifi password and the country your wifi operates in.
  • select your timezone and keyboard layout
  • click SAVE

GENERAL

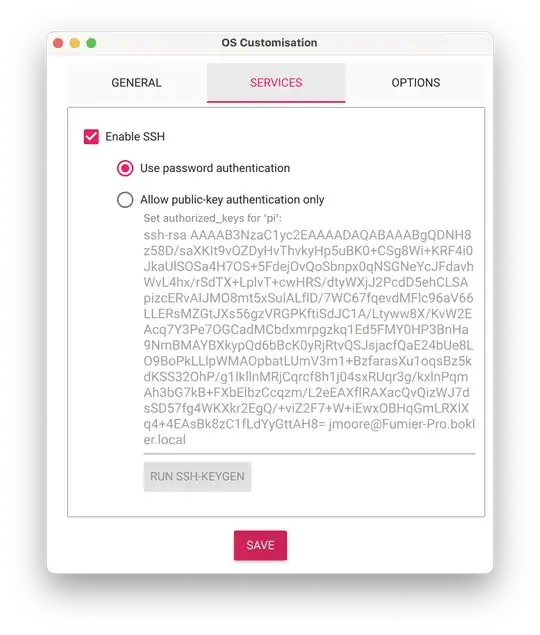
  1. SERVICES
  • Click the SERVICES tab at the top of the window
  • To keep things simple for now, select Enable SSH and select password authentication
  • click SAVE

SERVICES

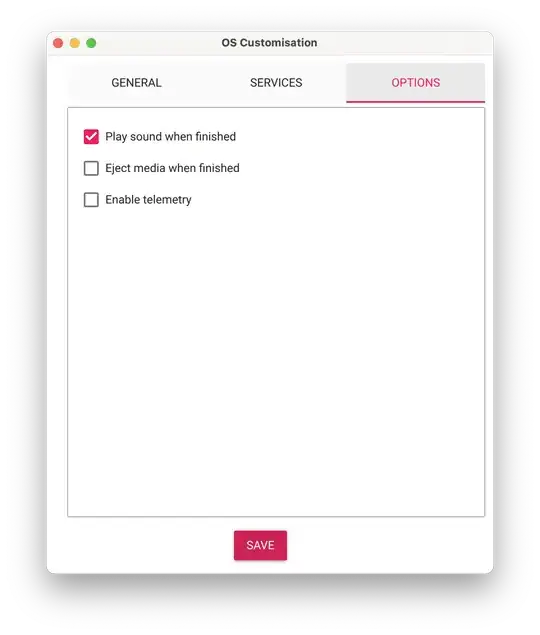
  1. OPTIONS
  • Click the OPTIONS tab at the top of the window
  • Select the Play sound when finished option, and select the Eject media when finished button
  • click SAVE

OPTIONS

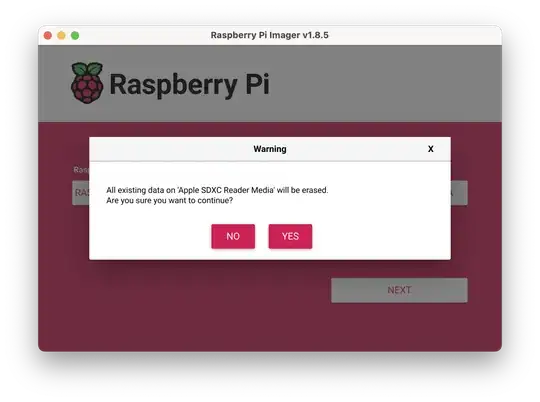
  1. This will bring you back to the Select the Use OS customisation pop-up. Now, click the YES button. You'll be asked to acknowledge & confirm that your SD card will be over-written. After clicking your approval (YES), the OS image you chose and the SETTINGS you entered will be written to your SD card. When the process is finished, you can remove your SD card from your computer, and insert it in your (un-powered) Raspberry Pi. When you connect an appropriate USB power source to your RPi, it should boot. After booting, you may connect from your computer using an SSH client application.

POP-UP CONFIRMATION

Seamus
  • 23,558
  • 5
  • 42
  • 83