I have done a lot of tries to make my two IMU work with my arduino. I'm also done with many research about it and I found this code:
 // I2C device class (I2Cdev) demonstration Arduino sketch for MPU6050 class
 // 10/7/2011 by Jeff Rowberg <jeff@rowberg.net>
 // Updates should (hopefully) always be available at
 //https://github.com/jrowberg/i2cdevlib
 //
// Changelog:
//     2011-10-07 - initial release

/* ============================================
 I2Cdev device library code is placed under the MIT license
 Copyright (c) 2011 Jeff Rowberg


 // Arduino Wire library is required if I2Cdev I2CDEV_ARDUINO_WIRE   implementation
 // is used in I2Cdev.h
 #include "Wire.h"

 // I2Cdev and MPU6050 must be installed as libraries, or else the .cpp/.h files
// for both classes must be in the include path of your project
 #include "I2Cdev.h"
 #include "MPU6050.h"

// class default I2C address is 0x68
// specific I2C addresses may be passed as a parameter here
// AD0 low = 0x68; (default for InvenSense evaluation board)
//AD0 high = 0x69;
MPU6050 accelgyro;
// accelgyroIC1.initialize();
//accelgyroIC2.initialize();
MPU6050 accelgyroIC1(0x69);
MPU6050 accelgyroIC2(0x68);

int16_t ax1, ay1, az1;
int16_t gx1, gy1, gz1;

int16_t ax2, ay2, az2;
int16_t gx2, gy2, gz2;

#define LED_PIN 13
bool blinkState = false;

void setup() {
// join I2C bus (I2Cdev library doesn't do this automatically)
Wire.begin();

// initialize serial communication
// (38400 chosen because it works as well at 8MHz as it does at 16MHz, but
// it's really up to you depending on your project)
Serial.begin(38400);

// initialize device
Serial.println("Initializing I2C devices...");
//accelgyro.initialize();
accelgyroIC1.initialize();
accelgyroIC2.initialize();

// verify connection
Serial.println("Testing device connections...");
Serial.println(accelgyroIC1.testConnection() ? "MPU6050 #1 connection successful" : "MPU6050 connection failed");
Serial.println(accelgyroIC2.testConnection() ? "MPU6050 #2 connection successful" : "MPU6050 connection failed");

// configure Arduino LED for
  pinMode(LED_PIN, OUTPUT);
}

void loop() {
// read raw accel/gyro measurements from device
accelgyroIC1.getMotion6(&ax1, &ay1, &az1, &gx1, &gy1, &gz1);
accelgyroIC2.getMotion6(&ax2, &ay2, &az2, &gx2, &gy2, &gz2);

// these methods (and a few others) are also available
//accelgyro.getAcceleration(&ax, &ay, &az);
//accelgyro.getRotation(&gx, &gy, &gz);

// display tab-separated accel/gyro x/y/z values
Serial.println("MPU1:");      Serial.print("\t"    );     Serial.print("\t"      );
Serial.print(ax1);        Serial.print("\t"    );  Serial.print("\t"    );
Serial.print(ay1);        Serial.print("\t"    );  Serial.print("\t"    );
Serial.print(az1);        Serial.print("\t"    );  Serial.print("\t"    );
Serial.print(gx1);        Serial.print("\t"    );  Serial.print("\t"    );
Serial.print(gy1);        Serial.print("\t"    );  Serial.print("\t"    );
Serial.println(gz1);
delay(1000);


// display tab-separated accel/gyro x/y/z values
Serial.println("MPU2:");     Serial.print("\t"    );     Serial.print("\t"    );
Serial.print(ax2);       Serial.print("\t"    );   Serial.print("\t"    );
Serial.print(ay2);       Serial.print("\t"    );   Serial.print("\t"    );
Serial.print(az2);       Serial.print("\t"    );   Serial.print("\t"    );
Serial.print(gx2);       Serial.print("\t"    );   Serial.print("\t"    );
Serial.print(gy2);       Serial.print("\t"    );   Serial.print("\t"    );
Serial.println(gz2);
delay(1000);


// blink LED to indicate activity
blinkState = !blinkState;
digitalWrite(LED_PIN, blinkState);
}
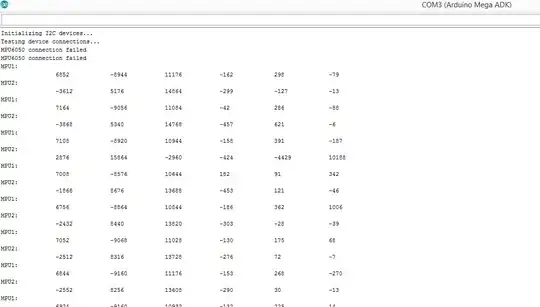
After running it, I'm wondering why the two MPU connections failed. Please see the attached image for the result I got.
And I guess that should be the probable reason why everytime I try to move the MPU1, the MPU2 varies like what is happening to the MPU1, and there are times that they get the same value.
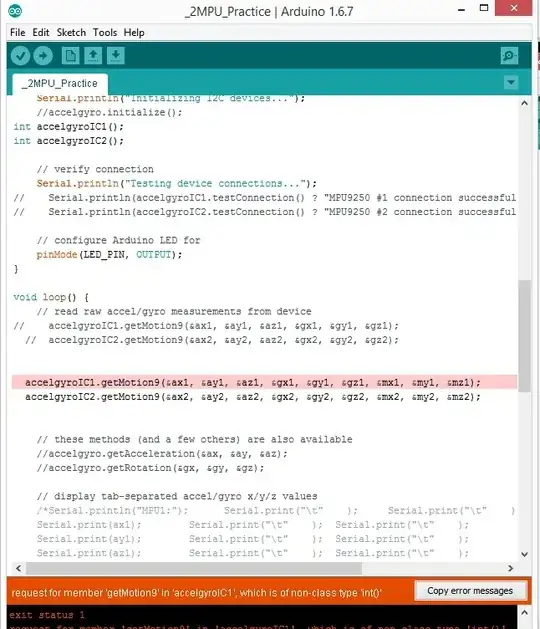
I also even tried to edit the code I posted above, and here it goes...
 #include <MPU9250.h>

 // I2C device class (I2Cdev) demonstration Arduino sketch for MPU6050 class
 // 10/7/2011 by Jeff Rowberg <jeff@rowberg.net>
 // Updates should (hopefully) always be available at
 //https://github.com/jrowberg/i2cdevlib
 //
 // Changelog:
 //     2011-10-07 - initial release


// Arduino Wire library is required if I2Cdev I2CDEV_ARDUINO_WIRE implementation
 // is used in I2Cdev.h
 #include "Wire.h"

 // I2Cdev and MPU6050 must be installed as libraries, or else the .cpp/.h files
 // for both classes must be in the include path of your project
 #include "I2Cdev.h"
 #include "MPU6050.h"

 // class default I2C address is 0x68
 // specific I2C addresses may be passed as a parameter here
  int AD0LOW= 0x68; //(default for InvenSense evaluation board)
  int AD0HIGH= 0x69;
  //MPU9250 accelgyro;
  int accelgyroIC1 ();
  int accelgyroIC2 ();
  //MPU9250 accelgyroIC1(0x68);
  //MPU9250 accelgyroIC2(0x69);

  int16_t ax1, ay1, az1;
  int16_t gx1, gy1, gz1;
  int16_t mx1, my1, mz1;

  int16_t ax2, ay2, az2;
  int16_t gx2, gy2, gz2;
  int16_t mx2, my2, mz2;

  #define LED_PIN 13
  bool blinkState = false;

  void setup() {
   // join I2C bus (I2Cdev library doesn't do this automatically)
   Wire.begin();
   Serial.begin(38400);

  // initialize device
   Serial.println("Initializing I2C devices...");
  //accelgyro.initialize();
  int accelgyroIC1();
  int accelgyroIC2();

   // verify connection
   Serial.println("Testing device connections...");
   //    Serial.println(accelgyroIC1.testConnection() ? "MPU9250 #1     connection successful" : "MPU9250 connection failed");
   //    Serial.println(accelgyroIC2.testConnection() ? "MPU9250 #2 connection successful" : "MPU9250 connection failed");

    // configure Arduino LED for
    pinMode(LED_PIN, OUTPUT);
    }

    void loop() {
   // read raw accel/gyro measurements from device
   //    accelgyroIC1.getMotion9(&ax1, &ay1, &az1, &gx1, &gy1, &gz1);
   //  accelgyroIC2.getMotion9(&ax2, &ay2, &az2, &gx2, &gy2, &gz2);


    accelgyroIC1.getMotion9(&ax1, &ay1, &az1, &gx1, &gy1, &gz1, &mx1, &my1, &mz1);
    accelgyroIC2.getMotion9(&ax2, &ay2, &az2, &gx2, &gy2, &gz2, &mx2, &my2, &mz2);


    // these methods (and a few others) are also available
    //accelgyro.getAcceleration(&ax, &ay, &az);
    //accelgyro.getRotation(&gx, &gy, &gz);

    // display tab-separated accel/gyro x/y/z values
    /*Serial.println("MPU1:");      Serial.print("\t"    );              Serial.print("\t"    );
   Serial.print(ax1);        Serial.print("\t"    );  Serial.print("\t"    );
   Serial.print(ay1);        Serial.print("\t"    );  Serial.print("\t"    );
   Serial.print(az1);        Serial.print("\t"    );  Serial.print("\t"    );
   Serial.print(gx1);        Serial.print("\t"    );  Serial.print("\t"    );
    Serial.print(gy1);        Serial.print("\t"    );  Serial.print("\t"    );
    Serial.println(gz1);
    delay(1000);


    // display tab-separated accel/gyro x/y/z values
     Serial.println("MPU2:");     Serial.print("\t"    );     Serial.print("\t"    );
    Serial.print(ax2);       Serial.print("\t"    );   Serial.print("\t"    );
    Serial.print(ay2);       Serial.print("\t"    );   Serial.print("\t"    );
    Serial.print(az2);       Serial.print("\t"    );   Serial.print("\t"    );
    Serial.print(gx2);       Serial.print("\t"    );   Serial.print("\t"    );
    Serial.print(gy2);       Serial.print("\t"    );   Serial.print("\t"    );
    Serial.println(gz2);
    delay(1000);*/

    Serial.print("MPU1:");
    Serial.print(ax); Serial.print("\t");   Serial.print("\t");   Serial.print("\t");
    Serial.print(ay); Serial.print("\t");   Serial.print("\t");   Serial.print("\t");
    Serial.print(az); Serial.print("\t");   Serial.print("\t");   Serial.print("\t");
    Serial.print(gx); Serial.print("\t");   Serial.print("\t");   Serial.print("\t");
    Serial.print(gy); Serial.print("\t");   Serial.print("\t");   Serial.print("\t");
    Serial.print(gz); Serial.print("\t");   Serial.print("\t");   Serial.print("\t");
    Serial.print(mx); Serial.print("\t");   Serial.print("\t");   Serial.print("\t");
    Serial.print(my); Serial.print("\t");   Serial.print("\t");   Serial.print("\t");
    Serial.println(mz);


     Serial.print("MPU2:");
    Serial.print(ax); Serial.print("\t");   Serial.print("\t");     Serial.print("\t");
     Serial.print(ay); Serial.print("\t");   Serial.print("\t");   Serial.print("\t");
     Serial.print(az); Serial.print("\t");   Serial.print("\t");   Serial.print("\t");
     Serial.print(gx); Serial.print("\t");   Serial.print("\t");   Serial.print("\t");
     Serial.print(gy); Serial.print("\t");   Serial.print("\t");   Serial.print("\t");
     Serial.print(gz); Serial.print("\t");   Serial.print("\t");   Serial.print("\t");
     Serial.print(mx); Serial.print("\t");   Serial.print("\t");   Serial.print("\t");
     Serial.print(my); Serial.print("\t");   Serial.print("\t");   Serial.print("\t");
      Serial.println(mz);


     // blink LED to indicate activity
     blinkState = !blinkState;
     digitalWrite(LED_PIN, blinkState);
      }
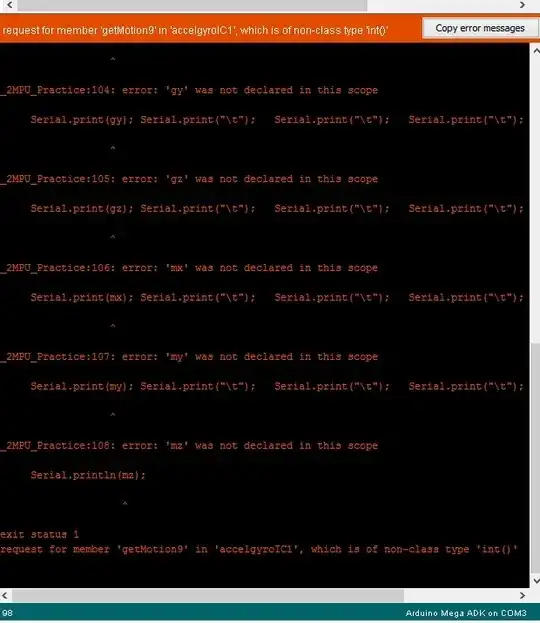
And please see the error that it displayed: (please see attached image)

With a result of: (please see image attched)
Please help me with these. I'm getting confused with my codes that I should be using and how to edit them. Please guide me on how to put connections in between them..
Thank you...
...Thom
This is the error message I copied:
Arduino: 1.6.7 (Windows 8.1), Board: "Arduino Mega ADK"

C:\Users\Jasmin.Morales\Desktop\_2MPU_Practice\_2MPU_Practice.ino: In function 'void loop()':

_2MPU_Practice:70: error: request for member 'getMotion9' in 'accelgyroIC1', which is of non-class type 'int()'

   accelgyroIC1.getMotion9(&ax1, &ay1, &az1, &gx1, &gy1, &gz1, &mx1, &my1, &mz1);

                ^

_2MPU_Practice:71: error: request for member 'getMotion9' in 'accelgyroIC2', which is of non-class type 'int()'

   accelgyroIC2.getMotion9(&ax2, &ay2, &az2, &gx2, &gy2, &gz2, &mx2, &my2, &mz2);

                ^

_2MPU_Practice:100: error: 'ax' was not declared in this scope

     Serial.print(ax); Serial.print("\t");   Serial.print("\t");   Serial.print("\t");

                  ^

_2MPU_Practice:101: error: 'ay' was not declared in this scope

     Serial.print(ay); Serial.print("\t");   Serial.print("\t");   Serial.print("\t");

                  ^

_2MPU_Practice:102: error: 'az' was not declared in this scope

     Serial.print(az); Serial.print("\t");   Serial.print("\t");   Serial.print("\t");

                  ^

_2MPU_Practice:103: error: 'gx' was not declared in this scope

     Serial.print(gx); Serial.print("\t");   Serial.print("\t");   Serial.print("\t");

                  ^

_2MPU_Practice:104: error: 'gy' was not declared in this scope

     Serial.print(gy); Serial.print("\t");   Serial.print("\t");   Serial.print("\t");

                  ^

_2MPU_Practice:105: error: 'gz' was not declared in this scope

     Serial.print(gz); Serial.print("\t");   Serial.print("\t");   Serial.print("\t");

                  ^

_2MPU_Practice:106: error: 'mx' was not declared in this scope

     Serial.print(mx); Serial.print("\t");   Serial.print("\t");   Serial.print("\t");

                  ^

_2MPU_Practice:107: error: 'my' was not declared in this scope

     Serial.print(my); Serial.print("\t");   Serial.print("\t");   Serial.print("\t");

                  ^

_2MPU_Practice:108: error: 'mz' was not declared in this scope

     Serial.println(mz);

                    ^

exit status 1
request for member 'getMotion9' in 'accelgyroIC1', which is of non-class type 'int()'

  This report would have more information with
  "Show verbose output during compilation"
  enabled in File > Preferences.